How to Add a New Disk in Linux on VM
1. Shutdown the VM and Add a New Disk
Adding a new disk to a Linux VM involves several steps, starting from configuring your virtual machine settings to recognizing the new disk within Linux. Here’s a detailed step-by-step guide:
First, log in to your Linux VM as the root user. Use the following command to list existing disk devices and identify where the new disk will be added:
[root@dbdocs ~]# ls /dev/sd*
/dev/sda  /dev/sda1  /dev/sda2  /dev/sdb  /dev/sdb1
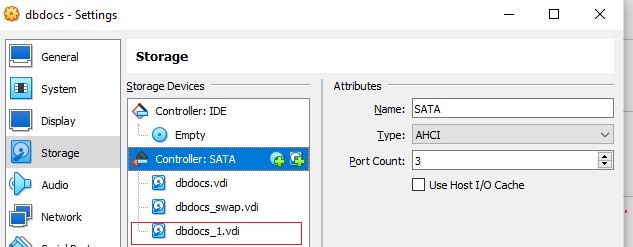
Next, access your VM’s settings in your virtualization software (e.g., VirtualBox, VMware). Right-click on the VM and select "Settings". In the settings menu, navigate to the "Storage" section.
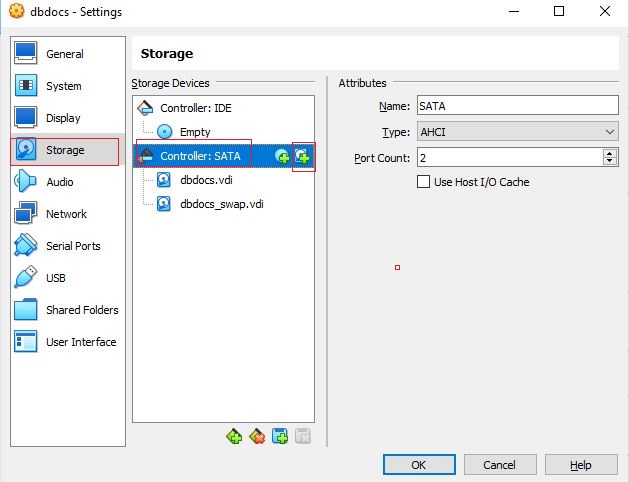
Find the SATA controller (or similar) and select it. Click on "Add Hard Disk" to start the process of adding a new disk.

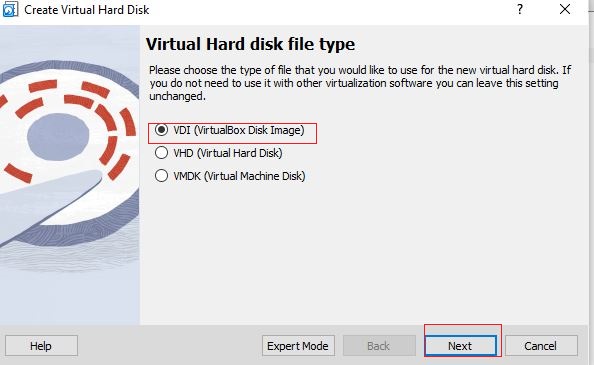
Choose "Create" to proceed with creating a new disk. Select "VDI (VirtualBox Disk Image)" or the equivalent option for your virtualization platform.
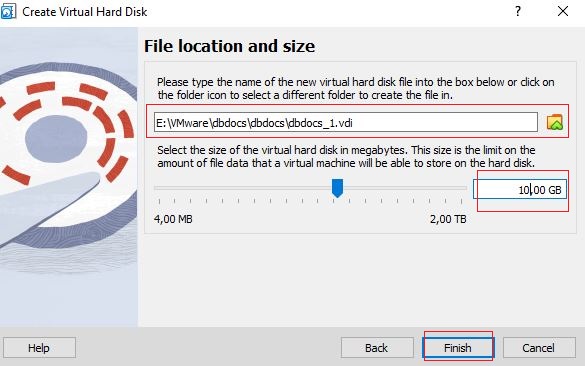
Specify the location and size of the new disk. Click "Finish" to finalize the addition of the disk.
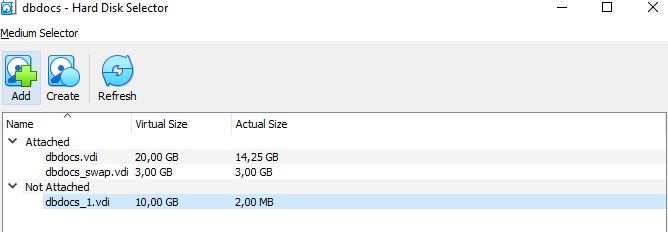
Start or restart your VM to make sure the new disk is recognized by the Linux system.
2. Mount the Disk and Create a Volume
Once your VM is running, log in again as the root user and check for the new disk with the following command:
[root@dbdocs ~]# ls /dev/sd*
/dev/sda  /dev/sda1  /dev/sda2  /dev/sdb  /dev/sdb1  /dev/sdc
The new disk should appear as /dev/sdc or a similar identifier. Use fdisk to partition the new disk:
[root@dbdocs ~]# fdisk /dev/sdc

Welcome to fdisk (util-linux 2.37.4).
Changes will remain in memory only, until you decide to write them.
Be careful before using the write command.

Device does not contain a recognized partition table.
Created a new DOS disklabel with disk identifier 0x0f1bf131.

Command (m for help): p
Disk /dev/sdc: 10 GiB, 10737418240 bytes, 20971520 sectors
Disk model: VBOX HARDDISK
Units: sectors of 1 * 512 = 512 bytes
Sector size (logical/physical): 512 bytes / 512 bytes
I/O size (minimum/optimal): 512 bytes / 512 bytes
Disklabel type: dos
Disk identifier: 0x0f1bf131

Command (m for help): n
Partition type
   p   primary (0 primary, 0 extended, 4 free)
   e   extended (container for logical partitions)
Select (default p): p
Partition number (1-4, default 1): 1
First sector (2048-20971519, default 2048):
Last sector, +/-sectors or +/-size{K,M,G,T,P} (2048-20971519, default 20971519):

Created a new partition 1 of type 'Linux' and of size 10 GiB.

Command (m for help): w
The partition table has been altered.
Calling ioctl() to re-read partition table.
Syncing disks.
With the partition created, format it using the mkfs command:
[root@dbdocs ~]# mkfs -t ext3 /dev/sdc1
mke2fs 1.46.5 (30-Dec-2021)
Creating filesystem with 2621184 4k blocks and 655360 inodes
Filesystem UUID: df2e1931-462d-49b7-8aba-589b32412cb2
Superblock backups stored on blocks:
        32768, 98304, 163840, 229376, 294912, 819200, 884736, 1605632

Allocating group tables: done
Writing inode tables: done
Creating journal (16384 blocks): done
Writing superblocks and filesystem accounting information: done
Create a mount point for the new partition and mount it:
mkdir /u03
mount /dev/sdc1 /u03
To ensure the new disk is automatically mounted at boot, update the /etc/fstab file:
/dev/sdc1 /u03 ext3 defaults 1 3
Finally, reboot your VM to apply the changes:
[root@dbdocs ~]# reboot
After rebooting, verify the new volume is mounted correctly:
[root@dbdocs ~]# df -h
Filesystem             Size  Used Avail Use% Mounted on
/dev/sda1             1014M  292M  723M  29% /boot
/dev/sdb1              2.9G   92K  2.8G   1% /u02
/dev/sdc1              9.8G   92K  9.3G   1% /u03
The new volume /u03 is now available and ready for use.
3. Troubleshooting Common Issues
If you encounter any issues while adding a new disk to your Linux VM, here are some common problems and solutions:
- Disk Not Detected: Ensure the VM was restarted after adding the disk. Check the VM's settings to verify the disk was added correctly.
- Partition Issues: If the disk is not partitioning correctly, ensure you are using the correct device name and that the disk is not in use.
- Mounting Problems: Verify that the
/etc/fstab entry is correctly formatted and that the filesystem was created properly.
- Filesystem Errors: Run
fsck to check and repair filesystem errors if necessary.
For further assistance, consult the documentation for your specific virtualization software or Linux distribution.
Related Content