Installing Linux 9 on a Virtual Machine
Introduction
Welcome to our detailed guide on Installing Linux 9 on a Virtual Machine. This guide will walk you through every step necessary to get Linux 9.2 up and running on Virtual Machine. VirtualBox is an excellent tool for virtualization, allowing you to create and manage virtual machines on your physical computer. Whether you're a developer, tester, or hobbyist, this guide is designed to help you with the installation process of Linux 9.2 on VirtualBox.
Preparation for Installation
Before you start the installation of Linux 9.2 on a VirtualBox machine, ensure that you have the following:
- A Windows or Linux host machine with VirtualBox installed. If you need instructions on setting up VirtualBox, check out our guide on Installing Oracle VirtualBox on Windows.
- The ISO file for Linux 9.2, which can be downloaded from the official Linux distribution website.
- At least 2GB of RAM allocated to the virtual machine (VM) for a smoother experience.
- Enough disk space to accommodate the Linux installation, ideally 20GB or more.
Download Linux 9.2 ISO
To install Linux 9.2 on your VirtualBox machine, you first need to download the ISO file. Follow these steps:
- Visit the official Linux website or a trusted mirror.
- Locate the download section and select Linux 9.2.
- Download the ISO file to your local computer.
Once you have the ISO file, configure your VirtualBox machine to install Linux 9.2:
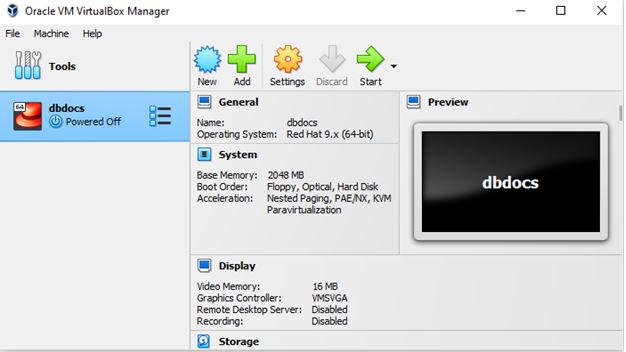
- Open VirtualBox and click on New to create a new virtual machine.
- Set the name of the VM and select Linux 9.2 as the version.
- Allocate RAM and disk space based on your requirements.
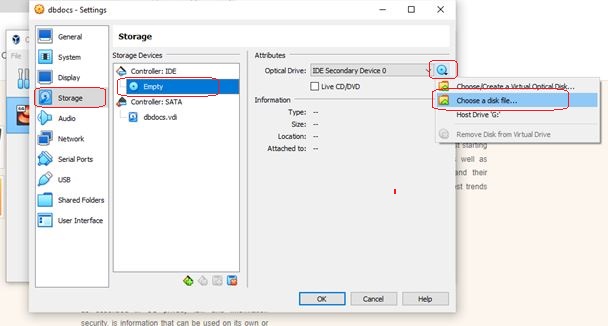
- Go to Settings -> Storage and mount the ISO file by selecting the disk icon and choosing the ISO file.
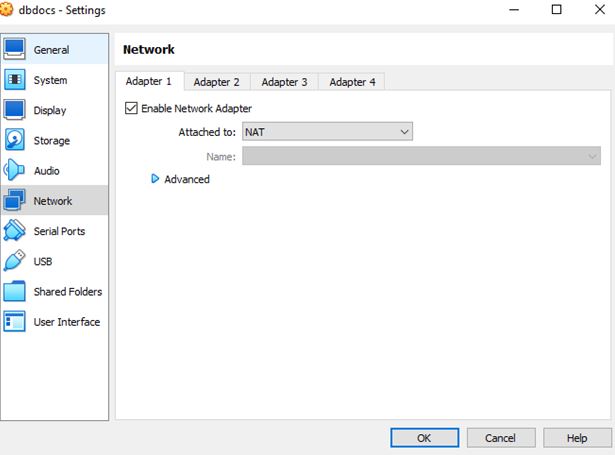
Click on Network - Adapter 1: Enable Network Adapter (checked), Attached to: NAT
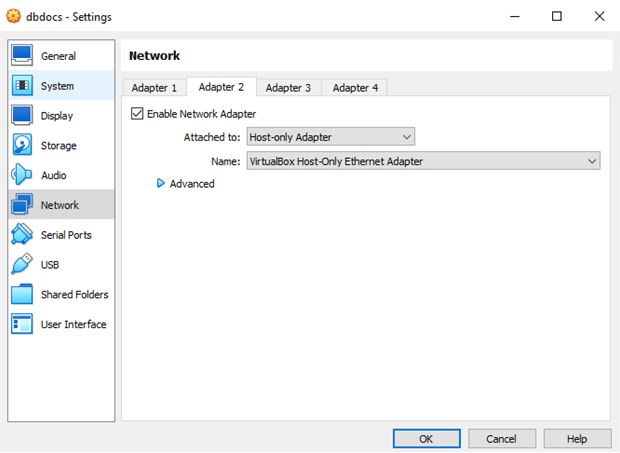
Click on Network - Adapter 2: Enable Network Adapter (checked), Attached to: Host-only Adapter
Start the Installation Process
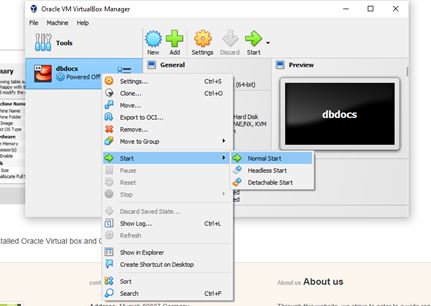
With the VM configured, start the installation process:
- Start the VM by right-clicking on it and selecting Start -> Normal Start.
- Follow the on-screen prompts to begin the Linux 9.2 installation.
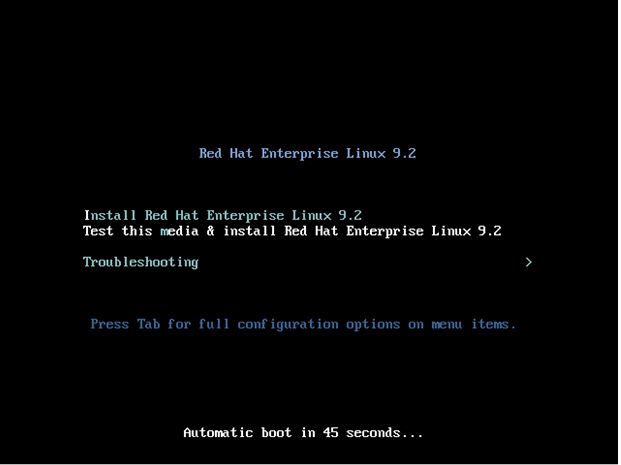
The following image will appear as a prompt:
Please press the "Enter" key.
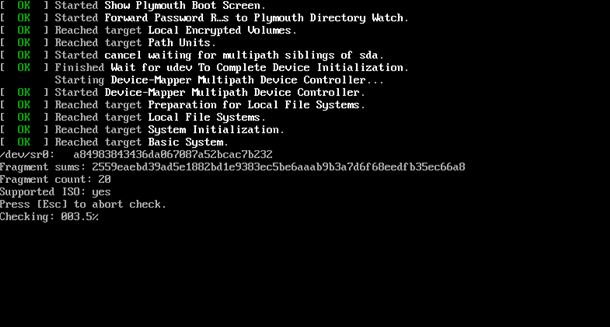
The installation process has begun.
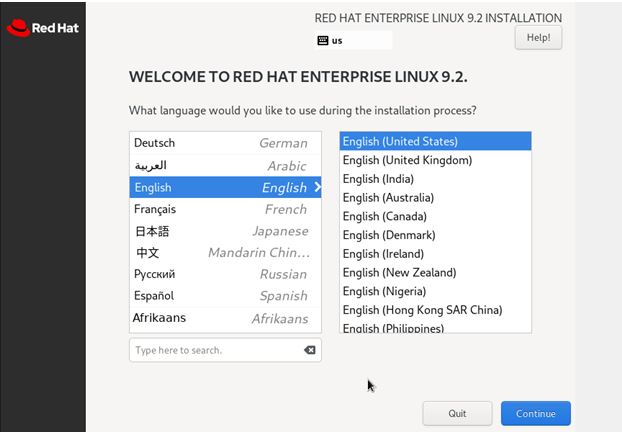
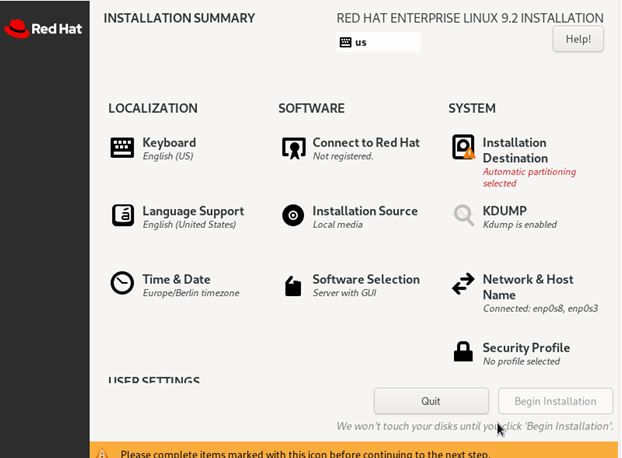
Please select your preferred language and click on continue
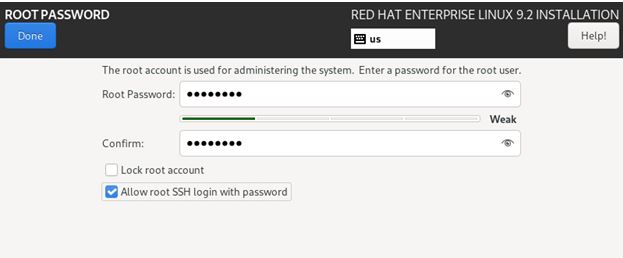
Scroll down and locate the option for "Root Password". Click on it to proceed.
Set the root password and Click "Done" to proceed.
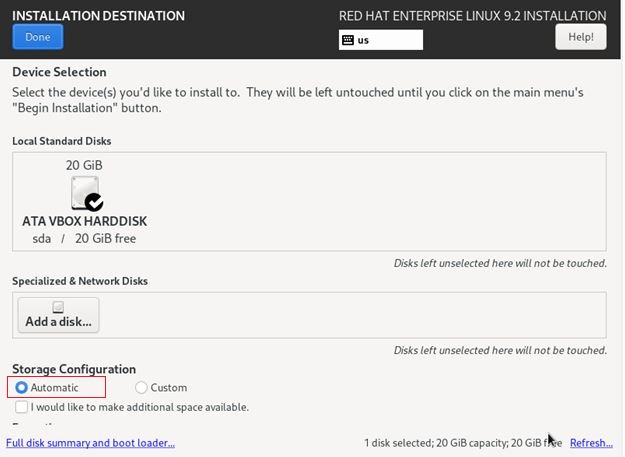
During the installation of Linux 9.2, you will need to configure disk partitions:
- Choose the Installation Destination and select Automatic Storage Configuration or customize the partitions as needed.
- Common partitions include
/ (root), swap, /home, and optionally /boot.
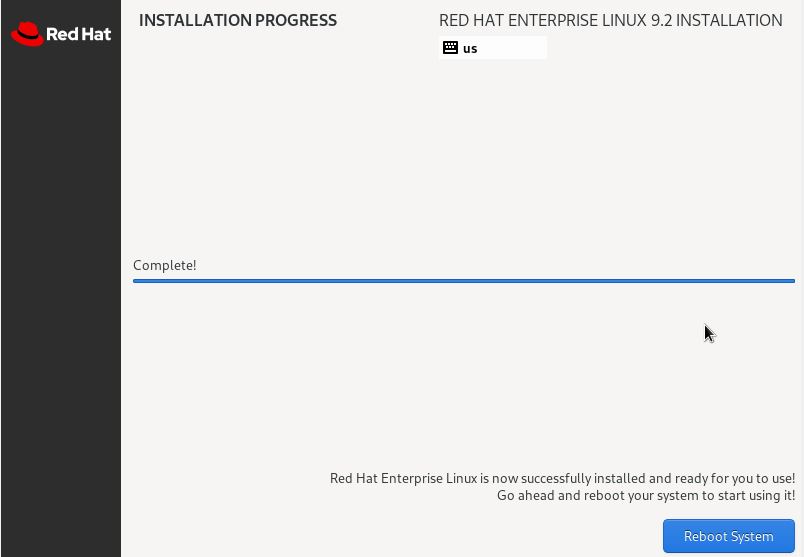
Complete the Installation
After configuring the partitions, click Begin Installation to proceed. The installation will take some time. Once completed:
- Click Reboot System to restart the VM.
- Follow the on-screen instructions to complete the initial setup.
Post-Installation Steps
Once Linux 9.2 is installed, you may need to perform some post-installation tasks:
- Update your system to ensure all packages are current.
- Install additional drivers or software as needed.
- Set up user accounts and configure system settings.
Troubleshooting
If you encounter issues during the installation, try these troubleshooting tips:
- Verify that the ISO file is correctly downloaded and not corrupted.
- Check VirtualBox settings to ensure they match the requirements for Linux 9.2.
- Consult the VirtualBox and Linux forums for specific error messages or issues.
Conclusion
Congratulations on successfully installing Linux 9.2 on your VirtualBox machine! You now have a fully functional Linux environment for testing, development, or learning purposes. This guide on Installing Linux 9 on a Virtual Machine covered all the essential steps from preparation to completion. If you found this tutorial helpful, please share it with others who may benefit from it. Stay tuned for more tutorials and tips on using VirtualBox and other virtualization tools!
Related Content