How to install Oracle database 19c on Linux Step-by-Step
In this article, we will learn how to install Oracle Database 19c on Linux. Whether you're an experienced database administrator or a beginner,
this step-by-step tutorial will help you set up Oracle Database 19c, ensuring a smooth and efficient installation.
We will cover the prerequisites, installation steps, and post-installation configurations to get your database up and running seamlessly on your Linux environment.
Installing Oracle Database 19c involves several steps, including downloading the software, preparing your system, and running the installation process.
Here is a step-by-step guide to installing Oracle 19c on a Linux system.
System Requirements and Preparation
Check System Requirements
Make sure your system meets the hardware and software requirements for Oracle 19c. You can find the requirements in the Oracle documentation. The following are some of the major requirements:
Check											|     Task
--------------------------------------------    -------------------------------------------------
Allocated disk space for the /tmp directory     |  At least 1 GB of space available in the /tmp directory.

Swap space allocation according to RAM  	    | 1 GB to 2 GB of RAM: 1.5 times the size of RAM
												| 2 GB to 16 GB of RAM: Equal to the size of RAM
												| More than 16 GB of RAM: 16 GB

Oracle Inventory (oraInventory)                 | Upgrades: The installer detects and uses the existing oraInventory directory from /etc/oraInst.loc
												| New Installs: If oraInventory is not configured, specify the directory during installation. Oracle Universal Installer will set it up according to Oracle Optimal Flexible Architecture.
												| OINSTALL Group: Must be the primary group for all Oracle software installation owners and writable by any Oracle installation owner.


Groups and users								| Create the necessary groups and user accounts for your security plans before starting the installation. Installation owners should have appropriate resource limits and other settings. Use only ASCII characters for group and user names

Mount point paths for the software Installation | Create them according to an Optimal Flexible Architecture configuration.
Download the Oracle 19c software
Download the Oracle 19c software from MOS
Download Oracle 19c.
Oracle 19c Installation Prerequisites
Prior to installing Oracle Database 19c, there are certain preinstallation steps that need to be performed. To accomplish this, follow these instructions and paste the provided command in your terminal to execute the preinstallation process.
Configure the host file
The server's fully qualified name should be included in the
/etc/hosts file.
[root@dbdocs system-connections]# cat /etc/hosts
127.0.0.1   localhost localhost.localdomain localhost4 localhost4.localdomain4
::1         localhost localhost.localdomain localhost6 localhost6.localdomain6
192.168.xxx.xx          dbdocs.dbnetwork.com        dbdocs
[root@dbdocs system-connections]#
Ensure that the accurate hostname is set within the
/etc/hostname file:
[root@dbdocs system-connections]# cat /etc/hostname
dbdocs
[root@dbdocs system-connections]#
There is an option to complete some of the preinstallation steps using the
oracle-database-preinstall-19c package. However, if you have not used this package to fulfill all prerequisites, you will need to manually perform the following setup tasks. In this tutorial, we will complete all the preinstallation steps manually to better understand the steps that need to be performed before installing Oracle 19c.
Configure the sysctl.conf file
Add the following lines to the
/etc/sysctl.conf file:
[root@dbdocs sysctl.d]# vi /etc/sysctl.conf
# sysctl settings are defined through files in
# /usr/lib/sysctl.d/, /run/sysctl.d/, and /etc/sysctl.d/.
#
# Vendors settings live in /usr/lib/sysctl.d/.
# To override a whole file, create a new file with the same in
# /etc/sysctl.d/ and put new settings there. To override
# only specific settings, add a file with a lexically later
# name in /etc/sysctl.d/ and put new settings there.
#
# For more information, see sysctl.conf(5) and sysctl.d(5).
#
fs.file-max = 6815744
kernel.sem = 250 32000 100 128
kernel.shmmni = 4096        #The minimum size, in bytes, of a single shared memory segment.
kernel.shmall = 1073741824
kernel.shmmax = 4398046511104  #The maximum size, in bytes, of a single shared memory segment. For best performance, it should be large enough to hold the entire SGA.
kernel.panic_on_oops = 1
net.core.rmem_default = 262144
net.core.rmem_max = 4194304
net.core.wmem_default = 262144
net.core.wmem_max = 1048576
net.ipv4.conf.all.rp_filter = 2
net.ipv4.conf.default.rp_filter = 2
fs.aio-max-nr = 1048576
net.ipv4.ip_local_port_range = 9000 65500
To change the current values of the kernel parameters:
[root@dbdocs sysctl.d]# /sbin/sysctl -p
Configure the limits.conf file
Configure the
/etc/security/limits.conf file to include the following parameters:
[root@dbdocs security]# vi /etc/security/limits.conf

oracle   soft   nofile    1024
oracle   hard   nofile    65536
oracle   soft   nproc    16384
oracle   hard   nproc    16384
oracle   soft   stack    10240
oracle   hard   stack    32768
oracle   hard   memlock    134217728
oracle   soft   memlock    134217728
Configure secure Linux to permissive
Configure secure Linux to permissive by editing the
/etc/selinux/config file and ensure the SELINUX flag is set as follows:
[root@dbdocs ~]# vi /etc/selinux/config
SELINUX=permissive
SELINUXTYPE=targeted

--Run the following command to apply the changes and make them take effect:
[root@dbdocs ~]# setenforce Permissive
Disable firewall
If you have the Linux firewall enabled, you will need to disable or configure the firewall rules appropriately. To disable the firewall, follow these steps:
[root@dbdocs ~]# systemctl stop firewalld
[root@dbdocs ~]# systemctl disable firewalld
Install the missing packages
The listed packages below are required for an Oracle 19c installation. Most of these packages should already be installed. Please install any missing packages using the Yum repository.
If you haven't set up a Yum repository yet, please refer to the tutorial
How to Configure an Offline YUM Repository in RHEL Linux for guidance.
rpm -q bc binutils compat-libcap1 compat-libstdc++-33 dtrace-utils elfutils-libelf elfutils-libelf-devel fontconfig-devel glibc glibc-devel ksh libaio libaio-devel libdtrace-ctf-devel libXrender libXrender-devel libX11 libXau libXi libXtst libgcc librdmacm-devel libstdc++ libstdc++-devel libxcb make net-tools nfs-utils python python-configshell python-rtslib python-six targetcli smartmontools sysstat libnsl libnsl2 libnsl.i686 libnsl2.i686

bc-1.07.1-14.el9.x86_64
binutils-2.35.2-37.el9.x86_64
package compat-libcap1 is not installed         #Missing
package compat-libstdc++-33 is not installed    #Missing
package dtrace-utils is not installed           #Missing
elfutils-libelf-0.188-3.el9.x86_64
package elfutils-libelf-devel is not installed  #Missing
package fontconfig-devel is not installed       #Missing
glibc-2.34-60.el9.x86_64
package glibc-devel is not installed            #Missing
package ksh is not installed                    #Missing
libaio-0.3.111-13.el9.x86_64
package libaio-devel is not installed           #Missing
package libdtrace-ctf-devel is not installed    #Missing
libXrender-0.9.10-16.el9.x86_64
package libXrender-devel is not installed       #Missing
libX11-1.7.0-7.el9.x86_64
libXau-1.0.9-8.el9.x86_64
libXi-1.7.10-8.el9.x86_64
libXtst-1.2.3-16.el9.x86_64
libgcc-11.3.1-4.3.el9.x86_64
package librdmacm-devel is not installed        #Missing
libstdc++-11.3.1-4.3.el9.x86_64
package libstdc++-devel is not installed        #Missing
libxcb-1.13.1-9.el9.x86_64
make-4.3-7.el9.x86_64
net-tools-2.0-0.62.20160912git.el9.x86_64
package nfs-utils is not installed              #Missing
package python is not installed                 #Missing
package python-configshell is not installed     #Missing
package python-rtslib is not installed          #Missing
package python-six is not installed             #Missing
package targetcli is not installed              #Missing
smartmontools-7.2-6.el9.x86_64
package sysstat is not installed                #Missing
package libnsl is not installed                 #Missing
package libnsl.i686 is not installed            #Missing
package libnsl2 is not installed                #Missing
package libnsl2.i686 is not installed           #Missing
Create user and groups
[root@dbdocs ~]# groupadd -g 5001 oinstall
[root@dbdocs ~]# groupadd -g 5002 dba
[root@dbdocs ~]# groupadd -g 5003 oper

[root@dbdocs ~]# useradd -u 5000 -g oinstall -G dba,oper oracle

--Set the password for the "oracle" user.

[root@dbdocs ~]# passwd oracle
Changing password for user oracle.
New password:
Retype new password:
passwd: all authentication tokens updated successfully.
[root@dbdocs ~]#
Create a directory structure
Create the directories for installing the Oracle software, following the Oracle Optimal Flexible Architecture (OFA) guidelines.
Placing mount points directly under the root directory without mounting separate disks to them is generally not recommended. While it is done here for simplicity, in a real installation, the "/" storage should be reserved exclusively for the operating system.
[root@dbdocs ~]# mkdir -p /opt/oracle/product/19.0.0/dbhome_1
[root@dbdocs ~]# mkdir -p /u01/oradata
[root@dbdocs ~]# chown -R oracle:oinstall /opt /u01
[root@dbdocs ~]# chmod -R 775 /opt /u01
[root@dbdocs ~]#
Set user profile
[root@dbdocs ~]# su - oracle

[oracle@dbdocs ~]$ vi .bash_profile
# .bash_profile
# Get the aliases and functions
if [ -f ~/.bashrc ]; then
        . ~/.bashrc
fi

umask 022
ORACLE_SID=dbdocs
ORACLE_BASE=/opt/oracle
ORACLE_HOME=$ORACLE_BASE/product/19.0.0/dbhome_1
LD_LIBRARY_PATH=$ORACLE_HOME/lib
TMP=/tmp
TMPDIR=/tmp
PATH=$PATH:$ORACLE_HOME/bin:$ORACLE_HOME/OPatch
export ORACLE_SID ORACLE_BASE ORACLE_HOME LD_LIBRARY_PATH TMP TMPDIR PATH
[oracle@dbdocs ~]$

[oracle@dbdocs ~]$ source .bash_profile
[oracle@dbdocs ~]$ echo $ORACLE_SID
dbdocs
Unzip Oracle Software
Login as the "oracle" user and proceed to unzip the software. Place the Oracle software under the Oracle home directory.
[oracle@dbdocs software]$ ll
total 2987996
-rwxrwxr-x. 1 oracle oinstall 3059705302 Jun  8 11:18 LINUX.X64_193000_db_home.zip

[oracle@dbdocs software]$ unzip -q LINUX.X64_193000_db_home.zip -d /opt/oracle/product/19.0.0/dbhome_1/
Setup X Display
To set up X display, please refer to the instructions provided in the
How to Setup X Display in Linux tutorial.
Oracle 19c Software Installation
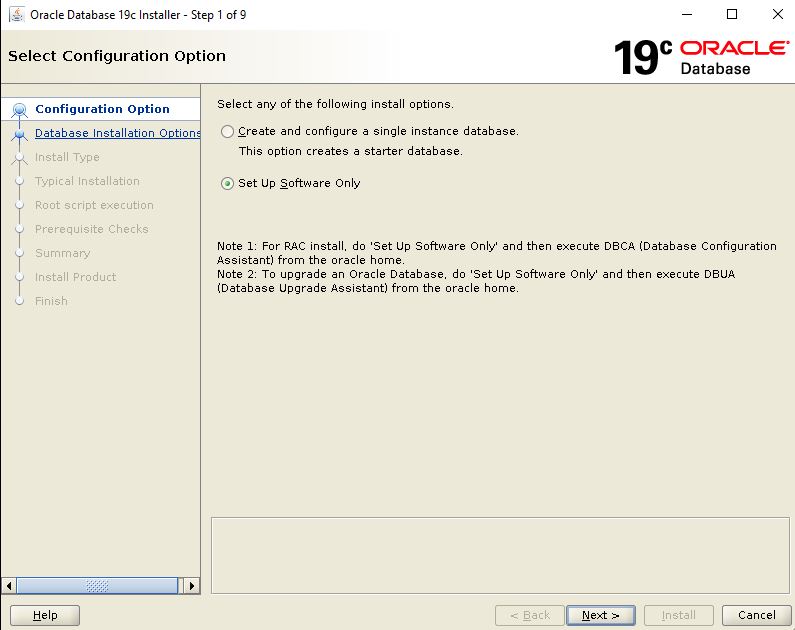
Here, we launch the runInstaller GUI to commence the installation process.
[oracle@dbdocs dbhome_1]$ ./runInstaller
Choose the option
Set up Software Only from the selection menu
Choose the option
"Single Instance database Installation" from the selection menu

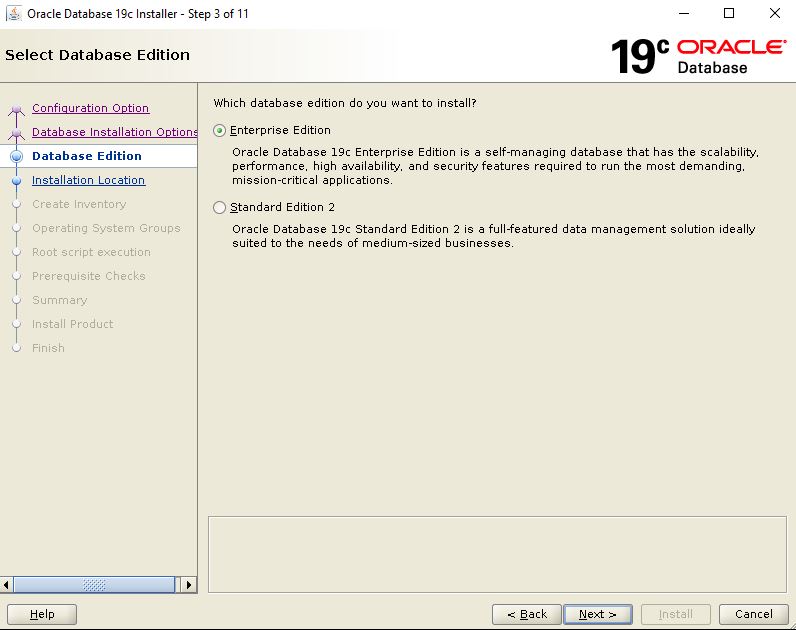
Select
"Enterprise Edition" from the available options.
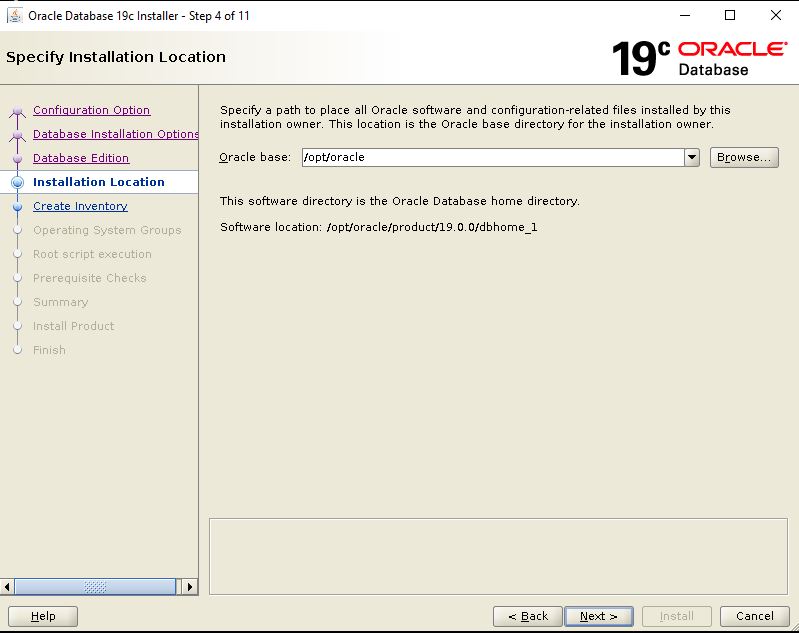
Specify the location of the
ORACLE_BASE
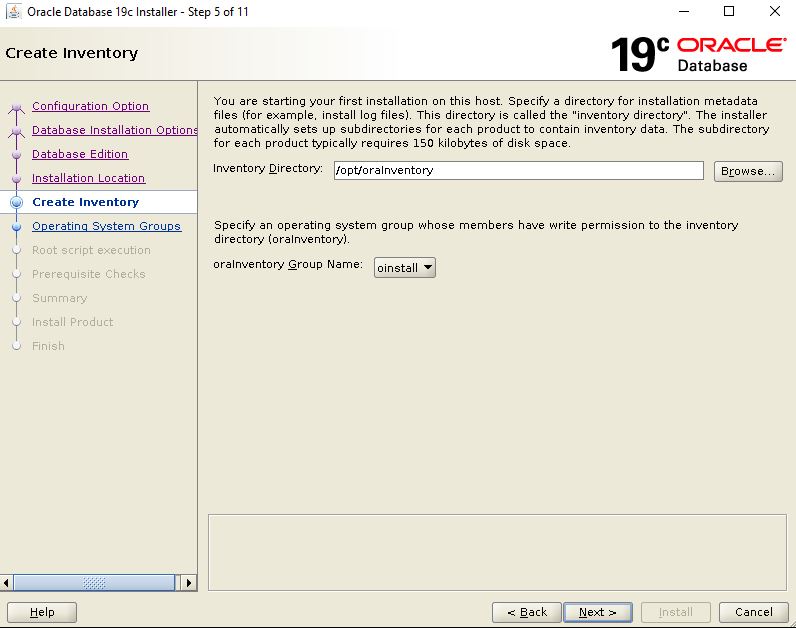
Specify the location of the ORACLE Inventory
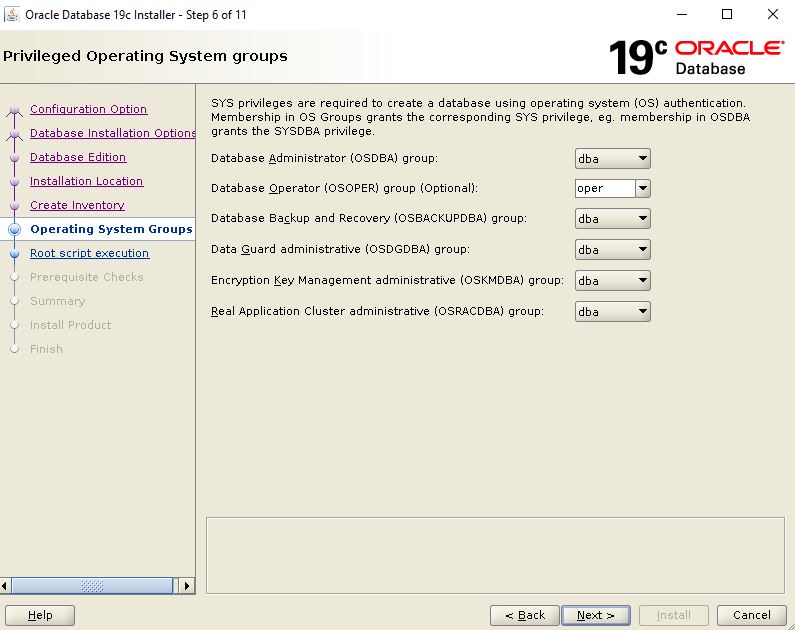
Select the appropriate
groups for the installation process
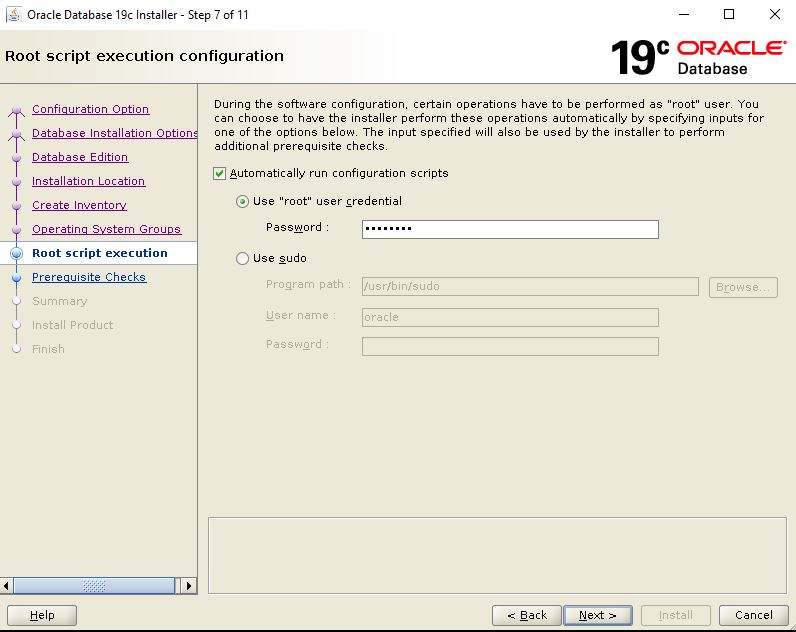
Specify the
root password for running configuration scripts
Click on
Install to proceed
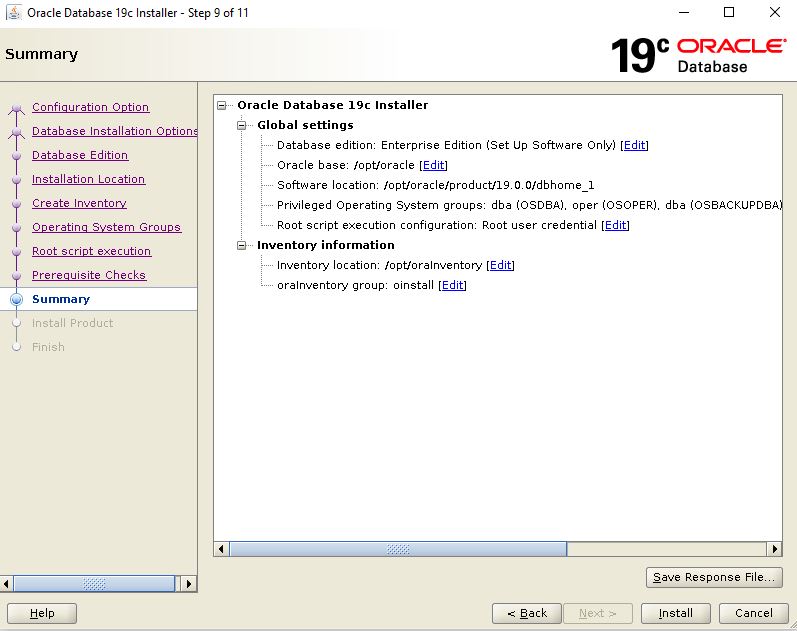
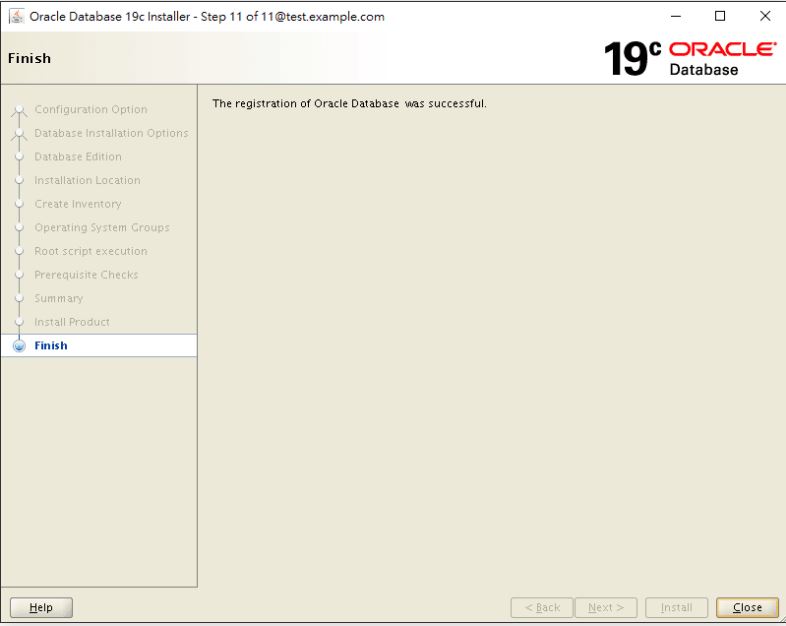
Oracle 19c
Software installation is complete now
Create an Oracle 19c database
Create a database
To create an Oracle 19c database, log in as the
oracle user and execute the
dbca command using the command prompt
    [oracle@dbdocs bin]$ cd /opt/oracle/product/19.3.0/dbhome_1/bin
    [oracle@dbdocs bin]$ ./dbca
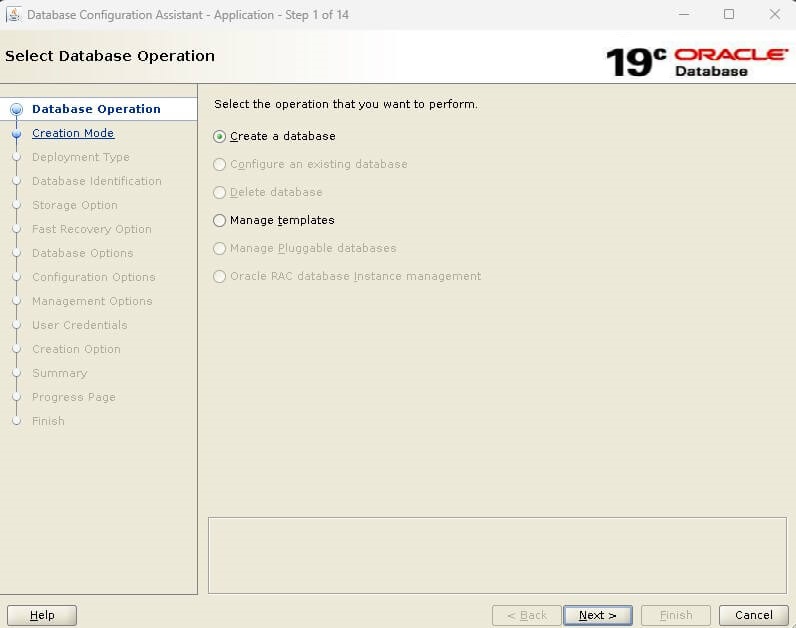
Choose the option
"Create a database" from the selection menu
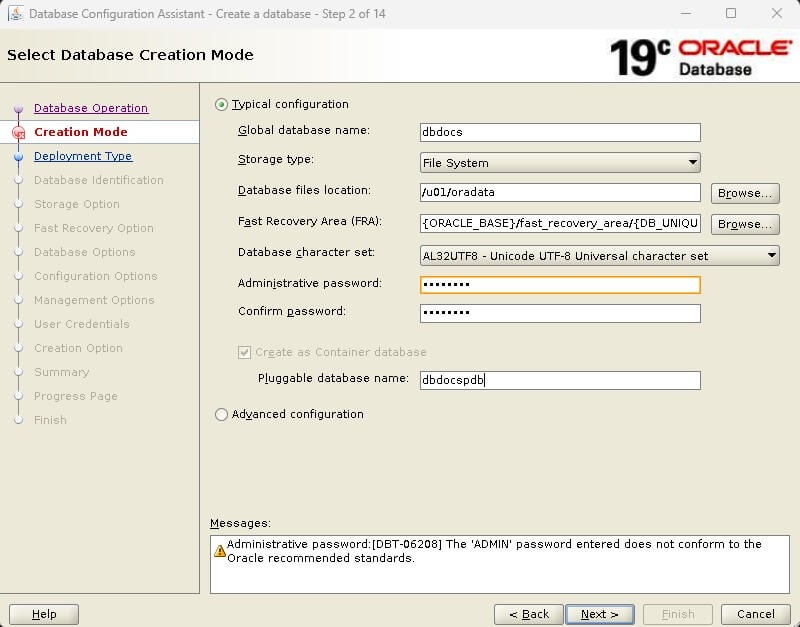
Enter the
Global database name,
Admin password, and
Pluggable database name
Click on
Next to continue
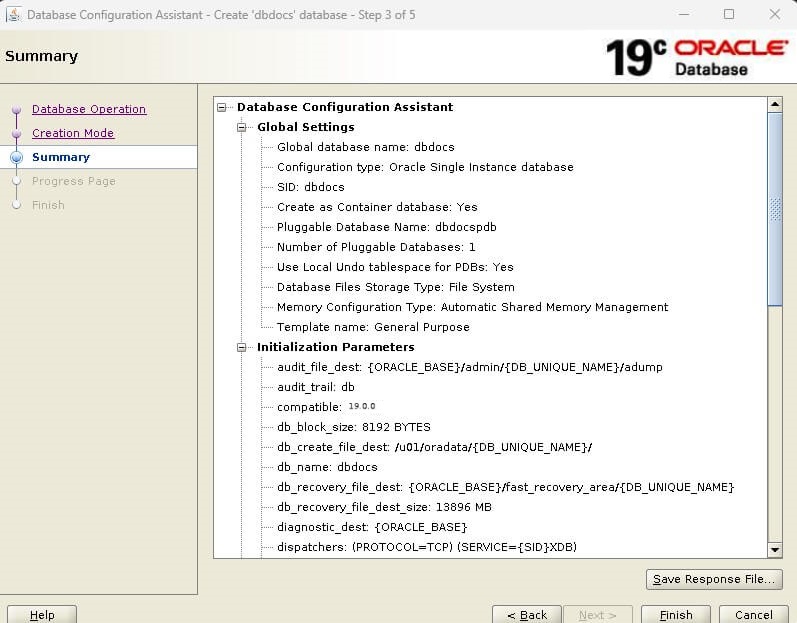
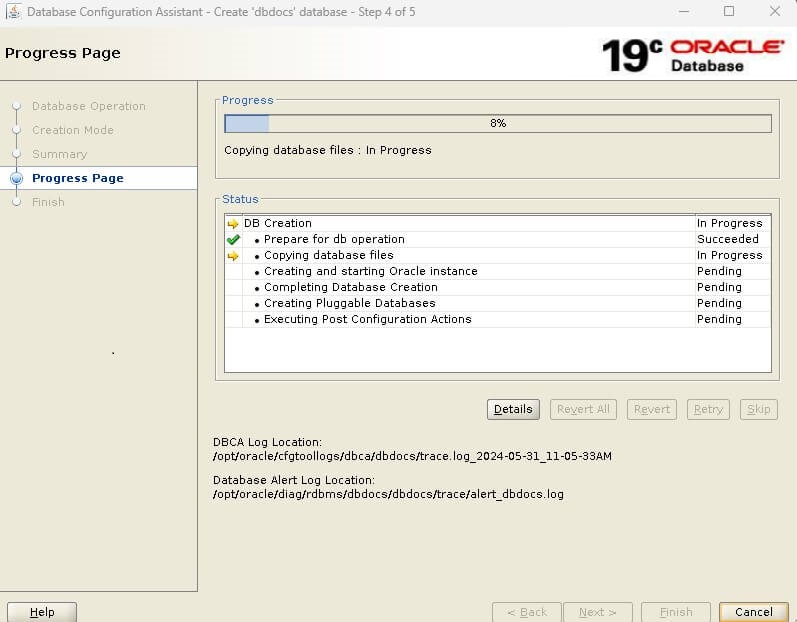
Validate the information and click on
Finish to continue
The database creation process has now commenced
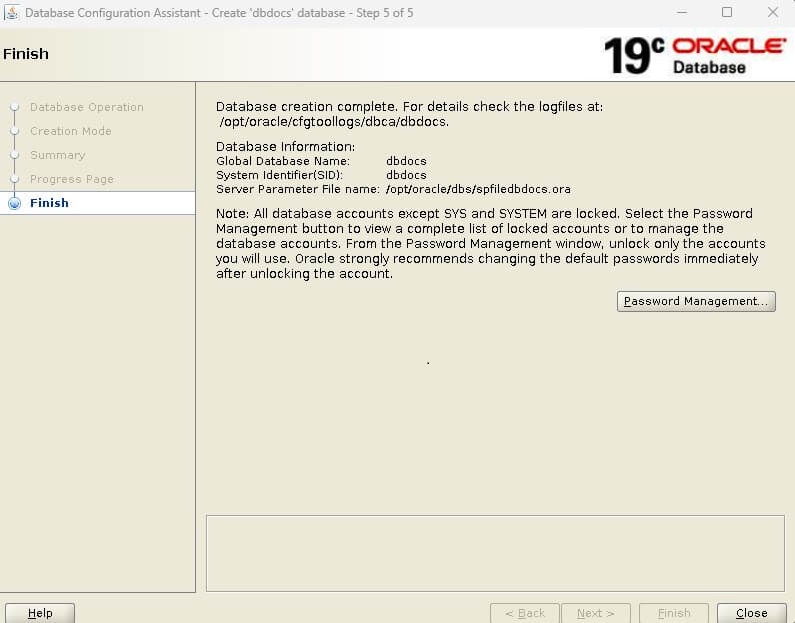
Oracle 19c database creation is complete now
[oracle@dbdocs ~]$ sqlplus
[oracle@dbdocs ~]$ sqlplus

SQL*Plus: Release 19.0.0.0.0 - Production on Fri May 31 11:19:27 2024
Version 19.3.0.0.0

Copyright (c) 1982, 2021, Oracle.  All rights reserved.

Enter user-name: / as sysdba

Connected to:
Oracle Database 19c Enterprise Edition Release 19.0.0.0.0 - Production
Version 19.3.0.0.0

SQL> select open_mode from v$database;

OPEN_MODE
--------------------
READ WRITE

SQL>
Configure the listener.ora file
Navigate to the $ORACLE_HOME/network/admin directory and create a listener.ora file.
[oracle@dbdocs admin]$ cd $ORACLE_HOME/network/admin

[oracle@dbdocs admin]$ vi listener.ora
LISTENER=
  (DESCRIPTION=
    (ADDRESS_LIST=
      (ADDRESS=(PROTOCOL=tcp)(HOST=dbdocs)(PORT=1521))
      (ADDRESS=(PROTOCOL=ipc)(KEY=extproc))))
SID_LIST_LISTENER=
  (SID_LIST=
    (SID_DESC=
      (GLOBAL_DBNAME=dbdocs)
      (ORACLE_HOME=/opt/oracle/product/19.3.0/dbhome_1)
      (SID_NAME=dbdocs))
)
Start the listener
[oracle@dbdocs admin]$ lsnrctl start

LSNRCTL for Linux: Version 19.0.0.0.0 - Production on 31-MAY-2024 11:25:24

Copyright (c) 1991, 2021, Oracle.  All rights reserved.

Starting /opt/oracle/product/19.3.0/dbhome_1/bin/tnslsnr: please wait...

TNSLSNR for Linux: Version 19.0.0.0.0 - Production
System parameter file is /opt/oracle/product/19.3.0/dbhome_1/network/admin/listener.ora
Log messages written to /opt/oracle/diag/tnslsnr/dbdocs/listener/alert/log.xml
Listening on: (DESCRIPTION=(ADDRESS=(PROTOCOL=tcp)(HOST=dbdocs)(PORT=1521)))
Listening on: (DESCRIPTION=(ADDRESS=(PROTOCOL=ipc)(KEY=extproc)))

Connecting to (DESCRIPTION=(ADDRESS=(PROTOCOL=tcp)(HOST=dbdocs)(PORT=1521)))
STATUS of the LISTENER
------------------------
Alias                     LISTENER
Version                   TNSLSNR for Linux: Version 19.0.0.0.0 - Production
Start Date                31-MAY-2024 11:25:24
Uptime                    0 days 0 hr. 0 min. 0 sec
Trace Level               off
Security                  ON: Local OS Authentication
SNMP                      OFF
Listener Parameter File   /opt/oracle/product/19.3.0/dbhome_1/network/admin/listener.ora
Listener Log File         /opt/oracle/diag/tnslsnr/dbdocs/listener/alert/log.xml
Listening Endpoints Summary...
  (DESCRIPTION=(ADDRESS=(PROTOCOL=tcp)(HOST=dbdocs)(PORT=1521)))
  (DESCRIPTION=(ADDRESS=(PROTOCOL=ipc)(KEY=extproc)))
Services Summary...
Service "dbdocs" has 1 instance(s).
  Instance "dbdocs", status UNKNOWN, has 1 handler(s) for this service...
The command completed successfully
Configure the tnsnames.ora file
Navigate to the $ORACLE_HOME/network/admin directory and create a tnsnames.ora file.
[oracle@dbdocs admin]$ vi tnsnames.ora
dbdocs =
  (DESCRIPTION =
    (ADDRESS_LIST =
      (ADDRESS = (PROTOCOL = TCP)(HOST = dbdocs)(PORT = 1521))
    )
    (CONNECT_DATA =
      (SERVICE_NAME = dbdocs)
    )
  )

dbdocspdb =
  (DESCRIPTION =
    (ADDRESS_LIST =
      (ADDRESS = (PROTOCOL = TCP)(HOST = dbdocs)(PORT = 1521))
    )
    (CONNECT_DATA =
      (SERVICE_NAME = dbdocspdb)
    )
  )
Test the connection to CDB and PDB
--CDB
[oracle@dbdocs admin]$ tnsping dbdocs

TNS Ping Utility for Linux: Version 19.0.0.0.0 - Production on 31-MAY-2024 11:28:05

Copyright (c) 1997, 2021, Oracle.  All rights reserved.

Used parameter files:


Used TNSNAMES adapter to resolve the alias
Attempting to contact (DESCRIPTION = (ADDRESS_LIST = (ADDRESS = (PROTOCOL = TCP)(HOST = dbdocs)(PORT = 1521))) (CONNECT_DATA = (SERVICE_NAME = dbdocs)))
OK (0 msec)

--PDB
[oracle@dbdocs admin]$ tnsping dbdocspdb

TNS Ping Utility for Linux: Version 19.0.0.0.0 - Production on 31-MAY-2024 11:28:16

Copyright (c) 1997, 2021, Oracle.  All rights reserved.

Used parameter files:


Used TNSNAMES adapter to resolve the alias
Attempting to contact (DESCRIPTION = (ADDRESS_LIST = (ADDRESS = (PROTOCOL = TCP)(HOST = dbdocs)(PORT = 1521))) (CONNECT_DATA = (SERVICE_NAME = dbdocspdb)))
OK (10 msec)
To learn about Oracle 23c new features, follow this article
Oracle 23c New Features: Redefine Your Business Success
Related content